Printing out a final design pattern for cutting out leather is highly recommended. Not only does it considerably limit the chances of incorrect dimensions and measurements that do not work (e.g. card slots that are too tight or too shallow, etc.), but it helps efficiently cut and use leather.
Which software you choose really comes down to whether or not you want to add accurate stitching hole guides to your pattern. If you’re just need templates for shapes and intend to use a wing divider and punch stitching holes without a pinpoint guide then free offerings such as Gravit Designer or Inkscape will be perfectly adequate. But not all graphics editors are capable of creating dashed lines of markers with a precise spacing in millimetres. We are using Adobe Illustrator for this particular example.
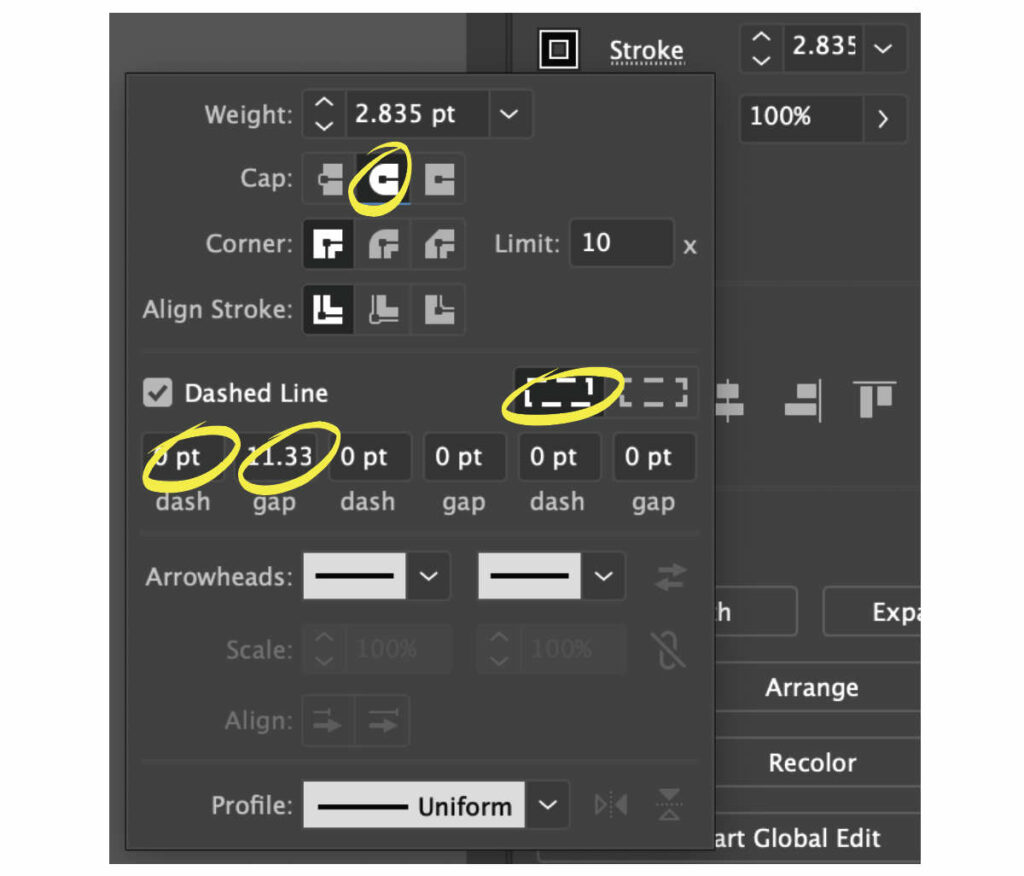
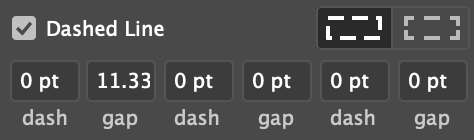
First of all, the method itself. The method is similar across many of the graphics editors. In Adobe Illustrator, after creating a -3mm offset line, we select the following from the stroke menu to get round stitching markers:
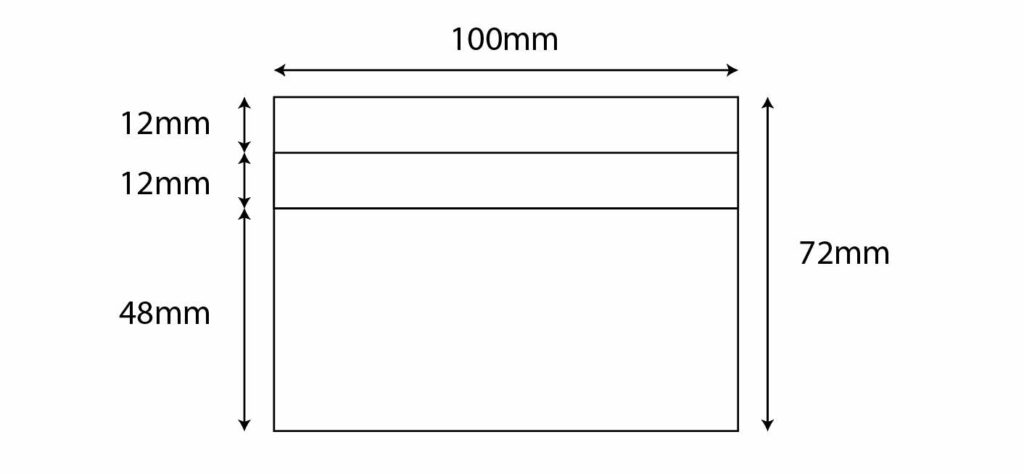
For this example, we’ll create a simple 4-slot card card holder (2 cards on each side with the design mirrored). We know a credit card is 53.98mm (H) x 85.6mm (W) and that approximately 100mm is a good width for the horizontal card slots. Let’s say we plan to use a 4mm pricking iron and thus set the height of our pockets at 12mm (it’s good practice to set the height of the visible section of the pocket to a multiple of the stitching iron size—we’ll see why shortly). We come up with dimensions as follows:
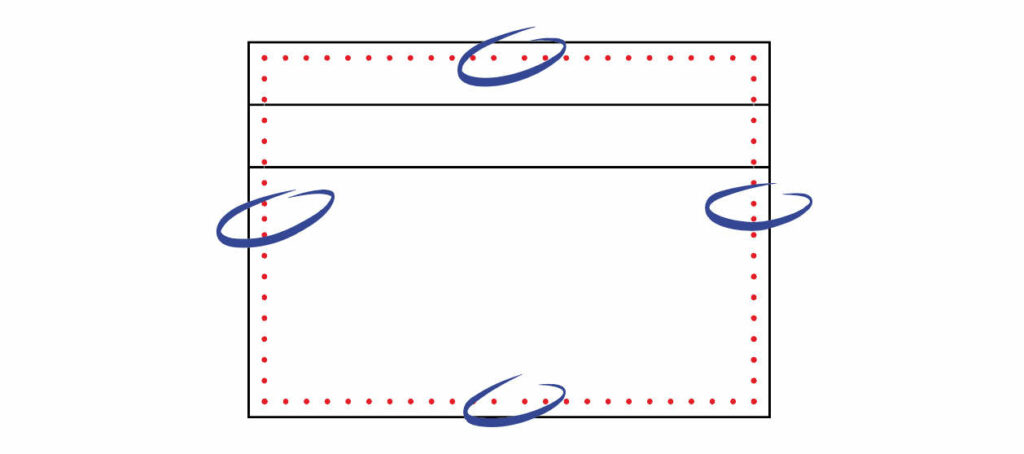
The problem is that when we add our 4mm stitching holes at a 3mm offset to the pattern it doesn’t look right. We don’t have stitching markers in the all corners and we’re going to have one stitch shorter or longer than the rest.

Incidentally, if you are using Adobe Illustrator selecting “Align dashes to corners and path ends” does not solve this problem because this alters the gap length of the dashes to match the stitching line, i.e. they’re no longer exactly 4mm.
There are two ways we can deal with this: (1) create lines running from each corner and deal with a few stitching holes that are shorter or longer, (2) slightly adjust the width and height of the card slot compartment so that it geometrically works with our choice of pricking iron.
Taking the first approach means that you’ll end up with something like the below. The areas where the stitching holes are not 4mm have been circled in blue. You essentially end up deciding whether you want a shorter or longer stitch at certain points, and where best to “hide” this.
The second approach is a lot cleaner. Here both the height and width of the compartment itself have been increased by just 2mm (an amount that will have no visual impact on the overall design) and now we have a card compartment whose geometry perfectly matches the width of the pricking iron.
Our original width was 100mm. Accounting for 2 x 3mm stitching allowance, we have a length 94mm for our 4mm stitching holes. 94 ÷ 4 = 23.5. This needs to be a whole number to avoid a shorter/longer stitch so we increase to 24.
24 x 4 = 96mm. Add back the 6mm stitching allowance and we end up with 102mm as the appropriate length. We do the same calculation for the height to get to 74mm.
We can also minutely adjust the position of the middle card slot so that the holes do not risk piercing the edge of the leather but we can do this only if we are using looped fabric card slots (if we use T-slots the bottom card would sink into the pocket too much as we are still relying on the bottom stitch of the compartment to hold it in place). This is why it is good practice to set the height of the pockets to a multiple of the stitching iron, especially when you have 3- or 4-slot compartments.
